Self Managed IAM using Keycloak and Terraform
Published on: Sunday, January 19, 2025
Introduction
In a Medium article I had previously discussed how to deploy Keycloak on a Kubernetes (aka K8s) cluster using Helm and then manually configuring Cloudflare Tunnels to expose the Application to public internet. It involved a few steps to say the least. Some of it involved managing Tunnel Secrets and a few other manual steps in order to get everything going. For first timers this could be a bit involved. In this blog we are going to simplify that using Terraform following the principles of Infrastructure as Code (IaC). I will show you how to use Terraform for a simple low touch code base with which you can deploy a publicly accessible Keycloak Deployment using Cloudflare Tunnels on a K8s cluster.
Prerequisites
We will need the following before we can get started.
- A working Kubernetes Cluster with accessible API Server from the machine you wish to run this from. This could be on any cloud provider like: AWS, GKE, Azure, Hetzner, etc or a bare metal system sitting in your home.
- A Cloudflare account with Fully-setup DNS
- Terraform installed locally on your machine. Feel free to use tfenv to quickly get started.
I am not going to delve into setting up a Kubernetes cluster. Please refer to any of my Medium articles for detailed step by step guide. The steps by which you setup a K8s cluster can depend on your choice of hardware/provider.
Overview
In this blog we are going to deploy a fully functional Keycloak instance exposed to public internet using Cloudflare Tunnels without having to manage sensitive tunnel tokens in less than 10 minutes. This is a great way to get started with Keycloak and IAM in general.
You will not have to worry about managing tunnel secrets or any other manual steps, and also don't need Load Balancers or Ingress Controllers. This way your deployment's origin is hidden behind Cloudflare's network and you can leverage their security features.
Let's get started! 🚀
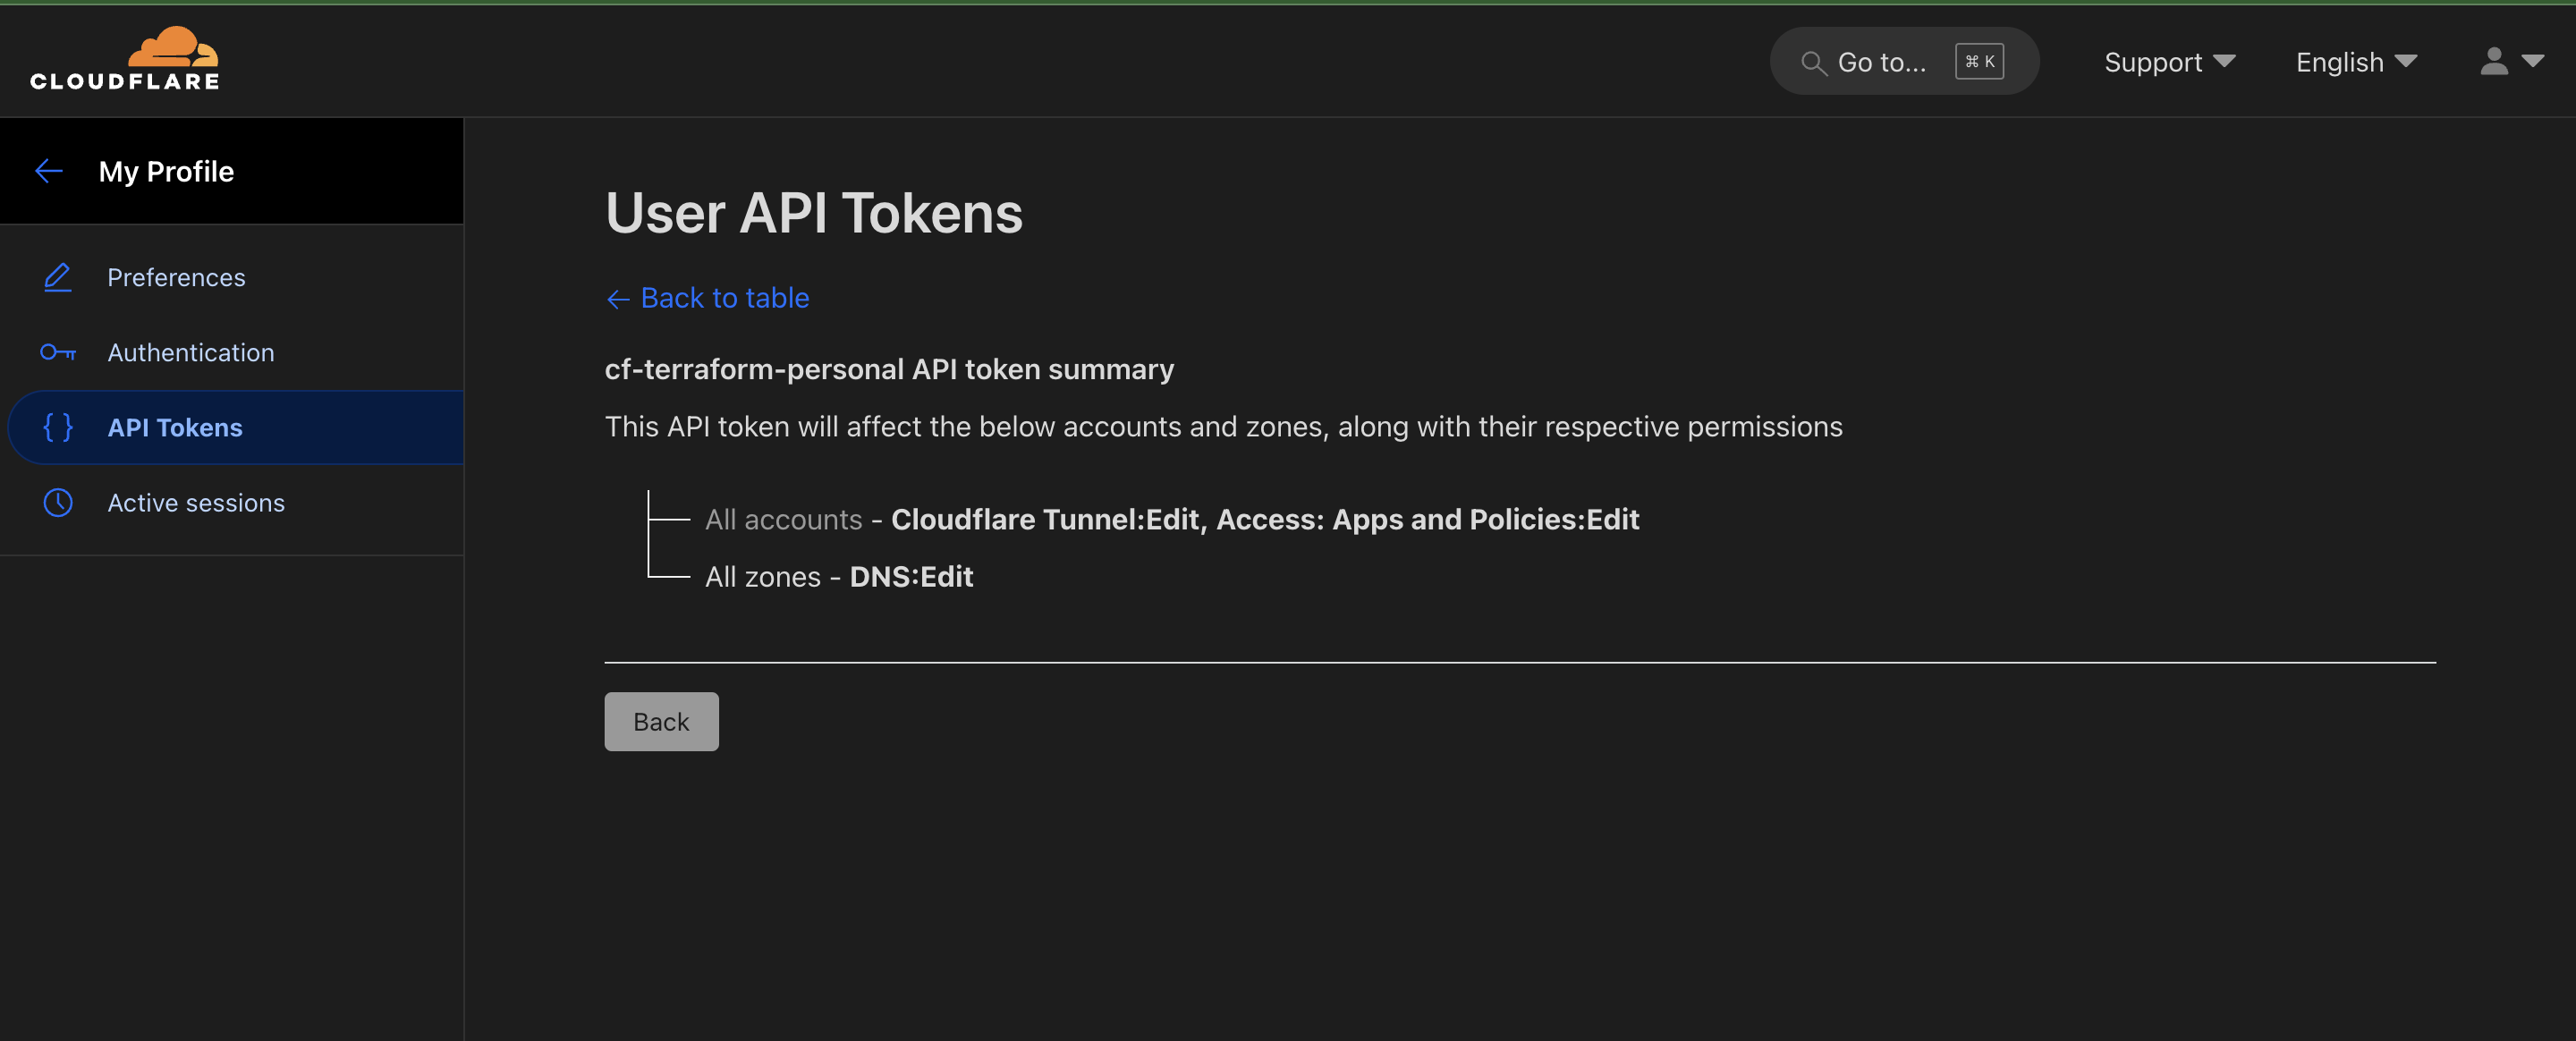
Step 1: Create a Cloudflare API token for use by Terraform
Visit Cloudflare dashboard and create a new API token with the following permissions:
Step 2: Clone the Terraform repository and populate variables
- Clone this repository on your machine from which you wish to deploy. This machine should be able to access your Kubernetes cluster through Kubeconfig.
git clone https://github.com/abasu0713/terrakube cd terrakube/keycloak - Add a file
variables.auto.tfvarsand populate the following variables:cf_domain: The root DNS record you wish to use on Cloudflarecf_zone_id: Cloudflare Zone ID for your DNS record
- Add a file
secrets.auto.tfvarsand populate the following variables:cf_api_token: API Token created in Step 1.cf_account_id: Cloudflare account IDkeycloak_admin_user_password: The temporary admin password you wish to use for your deployment.
- (Optional) Update any default values in
variables.tfas per your requirements
Make sure not to commit secrets.auto.tfvars into version control. The .gitignore is already updated to account for that.
Step 3: Deploy Keycloak using Terraform
Simply run the following commands and wait 10 min before the full deployment was complete:
terraform init
terraform validate
terraform plan --out plan.txt
terraform apply plan.txt
The above enables us to:
- Create a Cloudflare Tunnel (Locally Managed)
- Create DNS records for routing on the tunnel
- Create Tunnel configuration that points to the Keycloak Service (ClusterIP/No external access)
- Create a Kubernetes Namespace with non-enforcing Pod Admission Securities
- Create a deployment for keycloak using Terraform's Helm Provider
- Create a Kubernetes deployment using terraform for the Cloudflare tunnel within the cluster
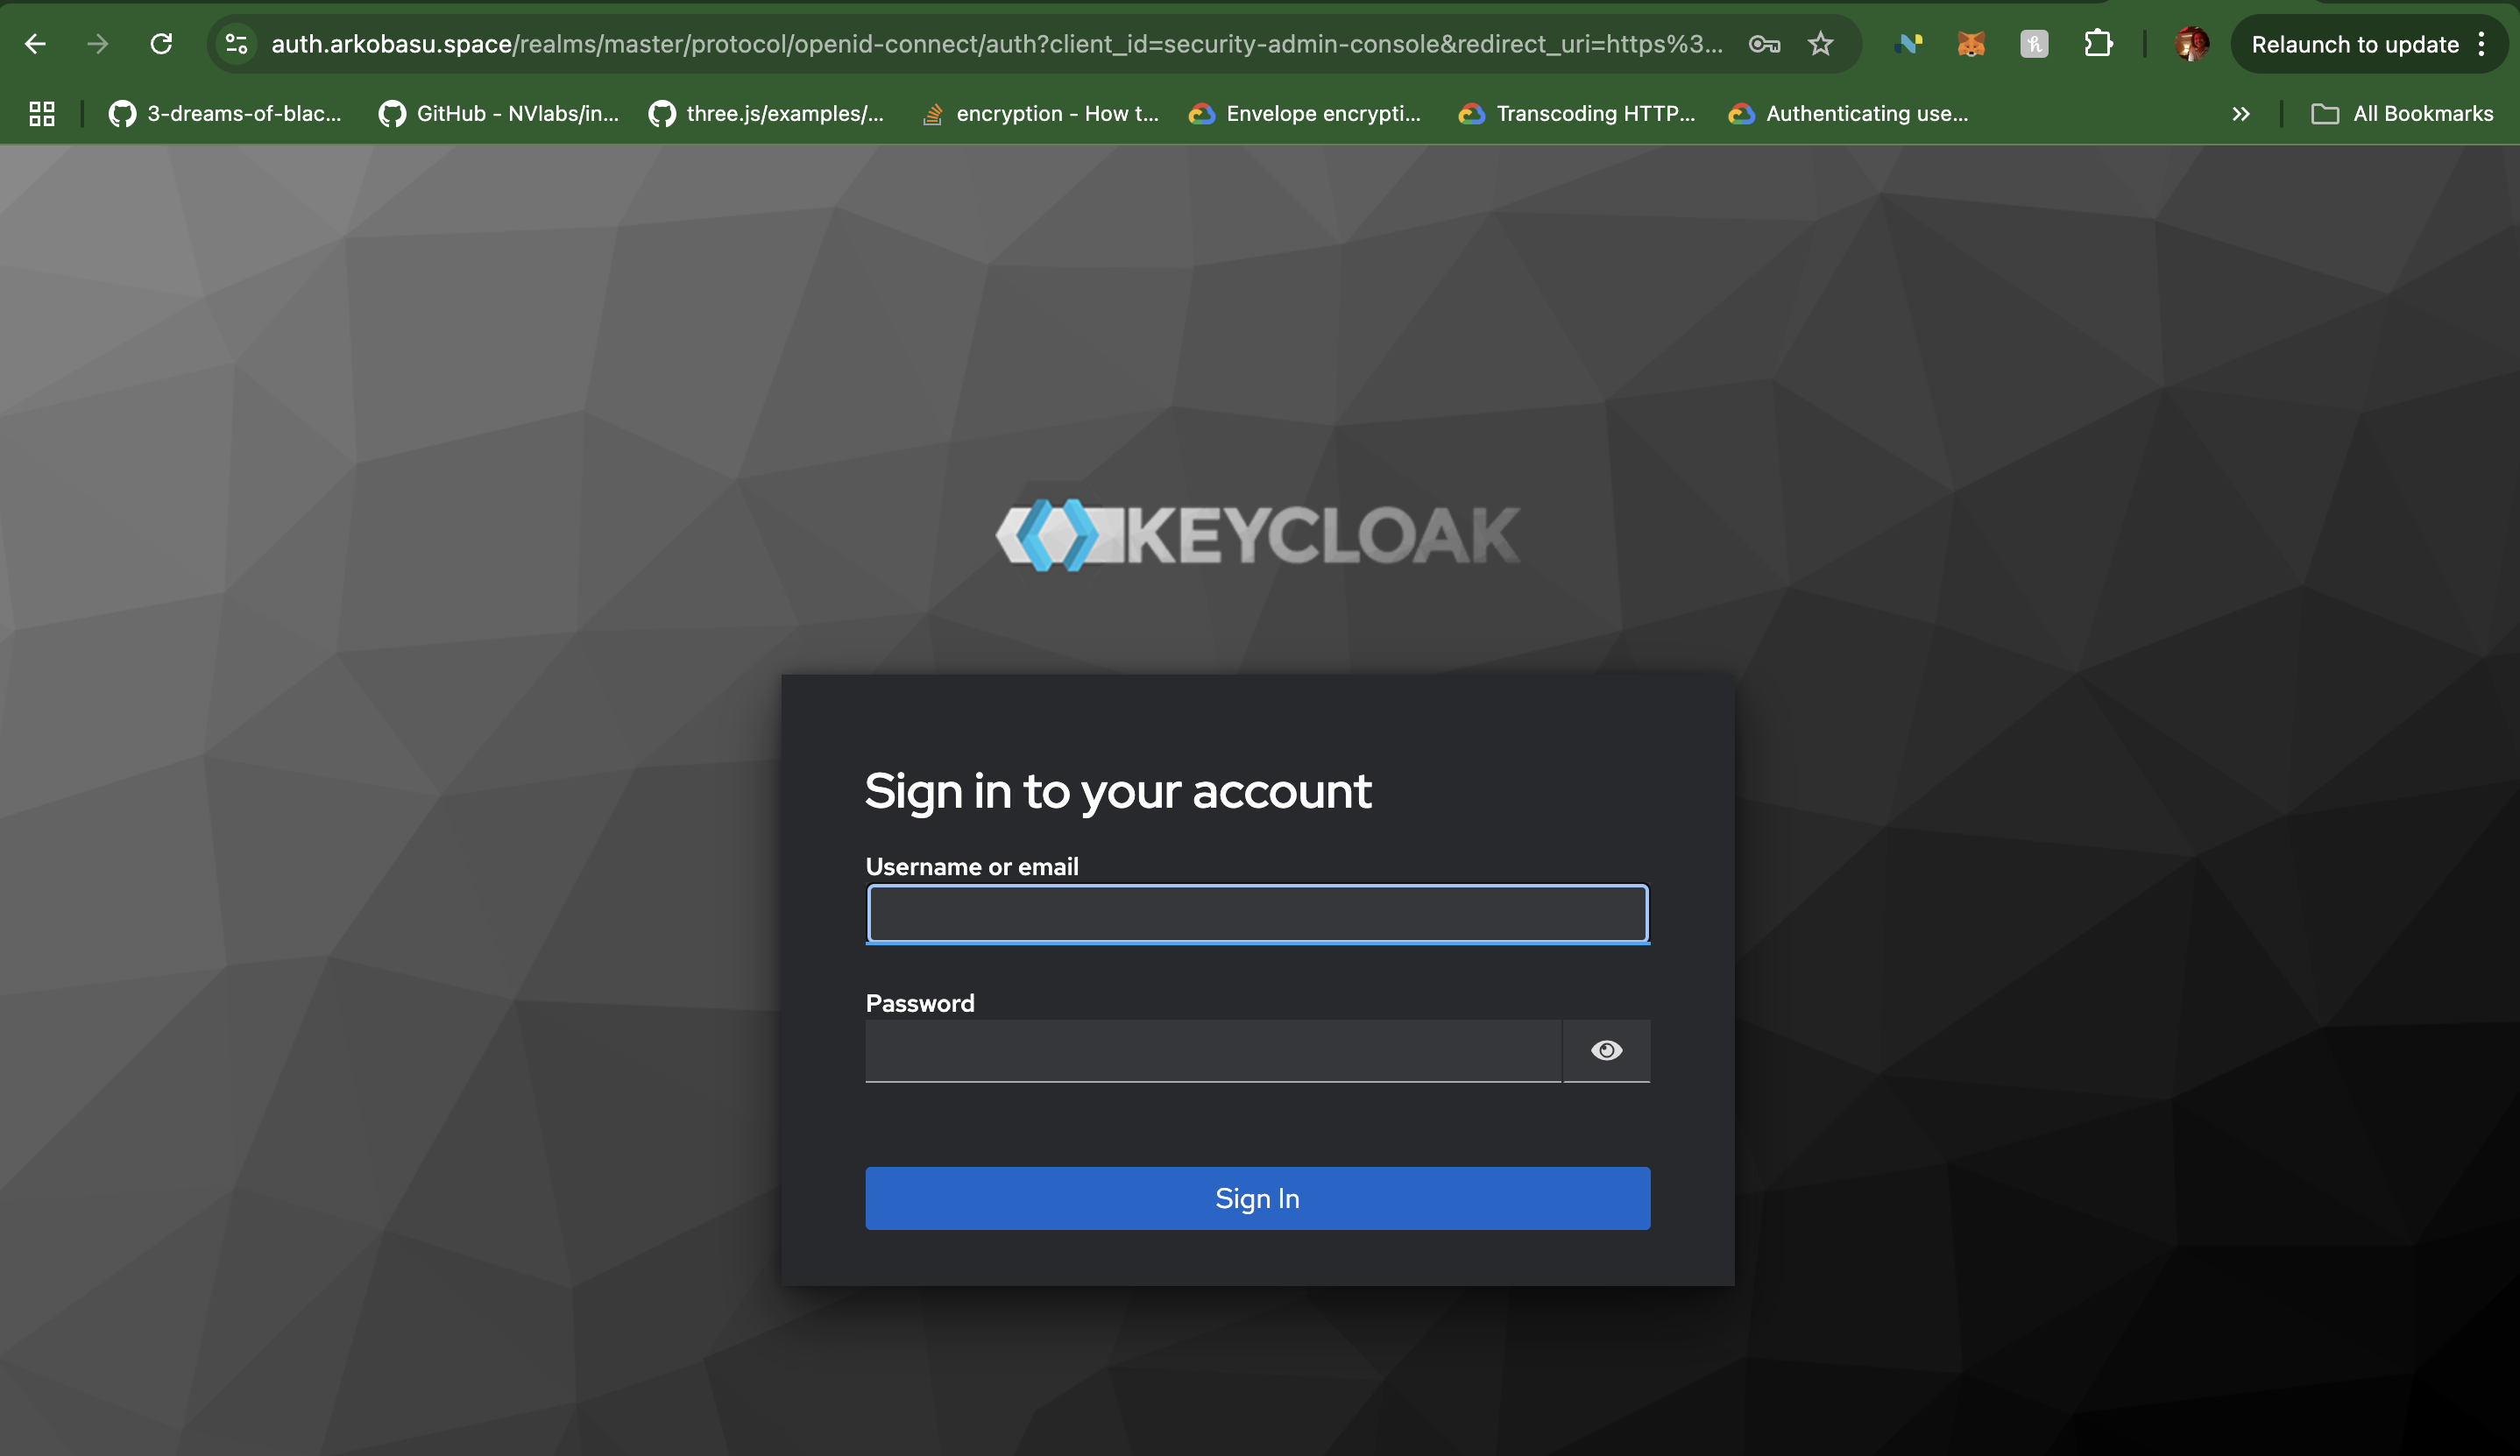
Once the terraform deployment completes simply nagivate to auth.<cf_domain> on a browser and validate your deployment.
After login, make sure to create a new admin user and delete the temporary admin user created during deployment. And also enable 2FA for the admin user. Feel free to use Authy, Google Authenticator or any other 2FA provider of your choice.
Conclusion
With this we have simplified our Keycloak deployment to a Kubernetes cluster from 20-30 steps to a bare minimum of 4 commands that takes not more than 10 min to deploy on an already existing K8s cluster. Feel free to take it out for a spin. If you were to chose a Cloud based deployment, simply make sure to update the KubeConfig before running terraform.