Managing Terraform State with a Ceph-Based S3 Backend
Published on: Tuesday, February 4, 2025
Introduction
When managing infrastructure with Terraform, maintaining state files is crucial for tracking resource changes and ensuring consistency. While cloud-based solutions like AWS S3, Azure Resource Manager, Google Cloud Storage, etc, are commonly used for remote state storage, they come with costs, vendor lock-in, and potential access limitations.
What if you could have the same object storage capability but fully self-hosted and cost-effective? That’s where Ceph’s Object Storage comes in. Ceph provides a scalable, highly available distributed storage solution with a S3-compatible API, making it an excellent choice for hosting Terraform state files.
In this guide, I will walk through why Ceph is a great alternative, how to set it up as a Terraform backend, and best practices to secure and optimize your state storage. Whether you're running a private cloud, managing multi-cloud deployments, or simply looking for a more flexible alternative to traditional cloud storage, this approach ensures control over your infrastructure state without compromising reliability.
Overview
In this blog we are going to:
- Review why Ceph is an amazing alternative for a unified distributed storage solution for all your software/application needs.
- Look at deploying a High Availability multi-node Ceph Cluster using commodity hardware.
- Enabling High Availability (HA) Service for Ceph Object Gateway (RGW) using Envoy and using Cloudflare Tunnels to securely expose HA RGW Service to public internet.
- Using Ceph's Squid release to manage accounts and users through the IAM and Admin APIs, just like you would on AWS or other Cloud providers that provide S3 Compatible Storage like: Digital Ocean, Oracle Cloud, etc.
- Finally, using Ceph hosted S3 buckets for Terraform backend configuration for state management.
Let’s dive in! 🚀
Ceph: A Unified, Scalable, and Fault-Tolerant Storage Solution
Ceph is an open-source, software-defined storage solution designed to provide unified, scalable, and highly available storage for modern infrastructure needs. Originally developed to handle massive-scale storage in a fault-tolerant and cost-effective manner, Ceph has become the go-to choice for enterprises, cloud providers, and high-performance computing environments. By leveraging a distributed architecture with no single point of failure, Ceph ensures data redundancy, self-healing capabilities, and dynamic scalability, making it ideal for both private and public cloud deployments.
Unlike traditional storage solutions that separate block, object, and file storage, Ceph integrates all three into a single, unified system. This flexibility allows organizations to consolidate their storage infrastructure while maintaining high performance, reliability, and efficiency. Whether you need fast block storage for databases, S3-compatible object storage for cloud-native applications, or a scalable distributed file system, Ceph provides a seamless, cost-effective alternative to proprietary storage solutions.
Three Core Storage Types in Ceph
- Ceph Block Storage (RADOS Block Device - RBD) provides high-performance, highly available block storage, making it ideal for virtual machines, cloud platforms, and containerized workloads. It supports advanced features like thin provisioning, snapshots, cloning, and replication, ensuring reliability for mission-critical applications. RBD integrates seamlessly with OpenStack, Kubernetes, and virtualization platforms like Proxmox, offering scalable and persistent storage solutions.
- Ceph Object Storage (RADOS Gateway - RGW) includes a S3-compatible object storage layer, allowing it to function as a drop-in replacement for AWS S3 or other cloud-based object stores. This makes it perfect for backup and archival storage, media streaming, AI/ML workloads, and big data analytics. With its multi-tenant support, access control mechanisms, and strong consistency guarantees, Ceph Object Storage is a reliable choice for organizations looking to self-host their cloud storage infrastructure without incurring vendor lock-in.
- Ceph File System (CephFS) is a fully distributed, POSIX-compliant file system that provides high-performance parallel access to large datasets. This makes it ideal for workloads such as high-performance computing (HPC), AI/ML pipelines, and shared enterprise storage. Unlike traditional file systems, CephFS can dynamically scale across multiple nodes while ensuring data redundancy and fault tolerance, making it a powerful alternative to legacy network file systems (NFS).
Why Choose Ceph?
- Scalability – Easily scale storage clusters from terabytes to petabytes without downtime.
- Fault Tolerance – Data replication, erasure coding, and self-healing ensure high availability.
- Unified Storage – Block, object, and file storage in a single platform reduces infrastructure complexity.
- Cost-Effective – Eliminates the need for expensive proprietary storage hardware by running on commodity servers or free tier VMs in a cloud agnostic manner without vendor lock-ins.
- Cloud-Native Integration – Works seamlessly with Kubernetes, OpenStack, and cloud-native workloads.
- Self-Healing & Automation – Ceph intelligently rebalances and repairs itself without manual intervention.
Now that we have covered the benefits of Ceph, let's dive into deploying it.
Deploying a High Availability multi-node Ceph Cluster
There are several ways to go about this. In this section I am going to give you 2 low ops alternative ways for quickly setting your own multi-node ceph cluster in absolutely no time.
- Manual: Using Snap Daemon on any supported Linux Distribution. In this Github Gist I walk through the manual steps required to bootstrap 3 bare-metal Linux flavored nodes in order to get a fully function HA Ceph cluster in less than 10 minutes.
- Automated: Using Ansible for automated deployment across fleets.. In this Github Gist I walk through a simple and automated way of deploying a fully functional HA Ceph cluster in less than 5 minutes using Ansible on any number of Linux based machines which supports the Snap daemon.
With a Ceph cluster up and running let's proceed to our next step.
If you are instead hoping to use a single node Ceph Cluster follow the instructions from Microceph's official documentation.
Publicly accessible Ceph RGW backed S3 API using Cloudflare Tunnels
In this section I am going to walk you through a simplified way of publicly exposing a single load balanced endpoint for multiple Rados Gateways using Envoy and Cloudflare tunnels.
The official documentation for HA service for RGW uses HAProxy, but in our case we are going to use Envoy instead.
I am also going to deploy Envoy and Cloudflare Tunnels on a Kubernetes (aka K8s) cluster that is within the same network but on a separate node and using Terraform. So that its a single deployment operation.
Prerequisites
We will need the following before we can get started.
- A working Kubernetes Cluster with accessible API Server from the machine you wish to run this from, within the same network boundary as your ceph cluster.
- A Cloudflare account with Fully-setup DNS
- Terraform installed locally on your machine. Feel free to use tfenv to quickly get started.
You don't necessarily have to use a Kubernetes cluster. You can directly deploy the envoy service and the cloudflare service manually. But using K8s makes it simpler since it's self healing and easily portable.
Enabling Rados Gateway
In this step we are going to enable Rados Gateway on at least 2 different nodes within our Ceph Cluster that we wish to load balance between.
Recommend not using active Ceph Cluster leaders
Assuming you have deployed Ceph Clusters by one of the aforementioned steps using Microceph
- Log into the desired nodes and run the following commands:
sudo microceph enable rgw - Once enabled, update the Rados Gateway configuration file to include the right domain name you wish to use for your gateway on Cloudflare Tunnels.
/var/snap/microceph/current/conf/radosgw.conf
# Generated by MicroCeph, DO NOT EDIT. [global] mon host = <redacted-ip-1>,<redacted-ip-2>,<redacted-ip-3> run dir = /var/snap/microceph/1260/run auth allow insecure global id reclaim = false [client.radosgw.gateway] rgw init timeout = 1200 rgw frontends = beast port=80 rgw_dns_name = <record>.<root-domain-on-cloudflare> rgw_enable_apis = s3, admin, sts, iam, notifications, s3website rgw_resolve_cname = true - Restart the Radog Gateway Service
systemctl list-units --type=service --state=active | grep -e "rgw.service"
systemctl restart snap.microceph.rgw.service
On to our next step.
Get Cloudflare API Token
Head on to your cloudflare account dashboard and create an API token with the following permissions:
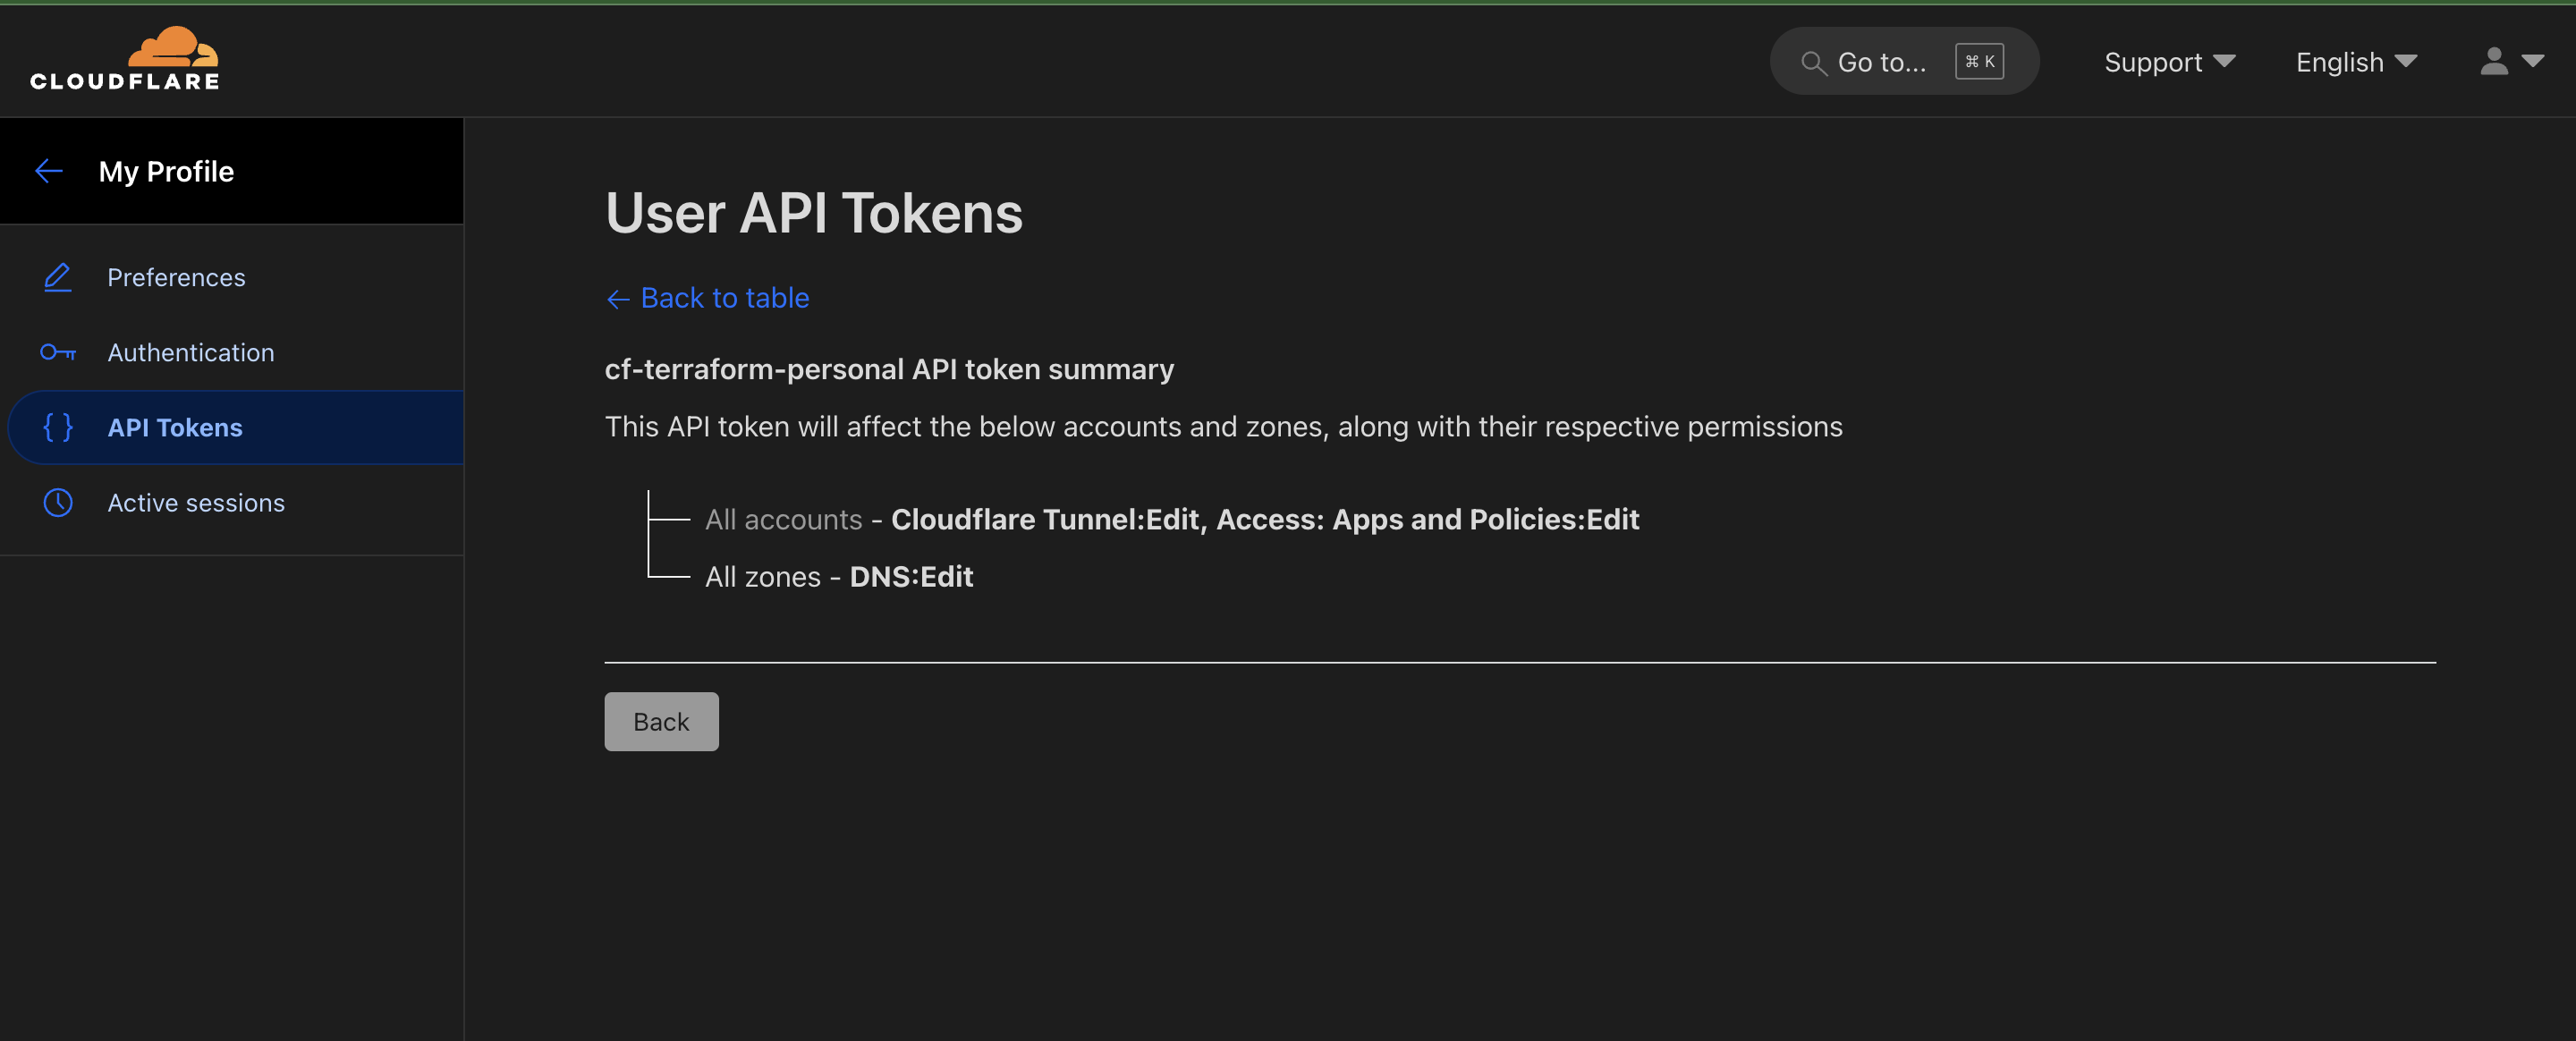
With that out of the way we can proceed to our next step.
Load Balance between RGW Services using Envoy-Proxy
In this step we are going to create the Envoy configuration that we are going to use for our Envoy-Proxy deployment in the following step. This will use Round-Robin method of load balancing between our RGW service Gateways. Following is a sample config:
Please update the endpoints as necessary. If you are using a Ceph deployment within the K8s cluster itself then these endpoints become the RGW Cluster Service endpoint instead.
We are not going to cover the scope of using SSL/TLS for our RGW gateway itself. May be in a later blog.
static_resources:
  listeners:
    - name: listener_0
      address:
        socket_address: { address: 0.0.0.0, port_value: 8080 }
      filter_chains:
        - filters:
          - name: envoy.filters.network.http_connection_manager
            typed_config:
              "@type": type.googleapis.com/envoy.extensions.filters.network.http_connection_manager.v3.HttpConnectionManager
              codec_type: auto
              stat_prefix: ingress_http
              route_config:
                name: local_route
                virtual_hosts:
                  - name: local_service_2
                    domains: ["<record>.<root-domain-on-cloudflare>"]
                    routes:
                      - match: { prefix: "/" }
                        route:
                          cluster: object_gateway
                          timeout: 5s
              http_filters:
                - name: envoy.filters.http.health_check
                  typed_config:
                    "@type": type.googleapis.com/envoy.extensions.filters.http.health_check.v3.HealthCheck
                    pass_through_mode: false
                    headers:
                    - name: ":path"
                      exact_match: "/healthz"
                    - name: "x-envoy-livenessprobe"
                      exact_match: "healthz"
                - name: envoy.filters.http.router
                  typed_config:
                    "@type": type.googleapis.com/envoy.extensions.filters.http.router.v3.Router
              original_ip_detection_extensions:
                - name: cf.original.ip.detection
                  typed_config:
                    "@type": type.googleapis.com/envoy.extensions.http.original_ip_detection.custom_header.v3.CustomHeaderConfig
                    header_name: "CF-Connecting-IP"
  clusters:
    - name: object_gateway
      type: static
      lb_policy: round_robin
      connect_timeout: 10s
      load_assignment:
        cluster_name: object_gateway
        endpoints:
          - lb_endpoints:
            - endpoint:
                address:
                  socket_address:
                    address: <rgw-service-host-ip-1>
                    port_value: 80
            - endpoint:
                address:
                  socket_address:
                    address: <rgw-service-host-ip-2>
                    port_value: 80
Please update the endpoints and the domain records as necessary
With the config defined we can proceed with the deployment. We are going to use this above config as a K8s ConfigMap for the Envoy-Proxy deployment to use.
Deploy Cloudflare Tunnel and Envoy Gateway to a Kubernetes Cluster
In this section we are going to setup some Terraform Scripts in order to deploy our Cloudflare tunnel and Envoy-Proxy to a Kubernetes (K8s) cluster.
Make sure you have installed Terraform.
Let's first define the following terraform files:
variable "cf_zone_id" {
  type        = string
  description = "cloudflare zone id"
}

variable "cf_account_id" {
  sensitive   = true
  description = "cloudflare account id"
}

variable "cf_domain" {
  description = "cloudflare domain"
}

variable "cf_api_token" {
  description = "cloudflare API Token"
  sensitive   = true
  type        = string
}

variable "cf_s3_gateway_domain_record" {
  description = "cloudflare domain record for s3 gateway"
}

variable "cf_tunnel_s3_gateway" {
  description = "cloudflare tunnel name for s3 gateway"
}
This is the basic definition of the variables that we are going to use for our terraform setup.
terraform {
  required_providers {
    random = {
      source = "hashicorp/random"
    }
    cloudflare = {
      source  = "cloudflare/cloudflare"
      version = "~> 4"
    }
    kubernetes = {
      source  = "hashicorp/kubernetes"
      version = "2.35.1"
    }
  }
  required_version = "1.5.7"
}

provider "cloudflare" {
  api_token = var.cf_api_token
}

provider "kubernetes" {
  config_path = "~/.kube/config"
}
This is our provider configuration.
resource "kubernetes_namespace" "keycloak_namespace" {
  metadata {
    name = var.cf_tunnel_s3_gateway
    labels = {
      "pod-security.kubernetes.io/audit"   = "restricted"
      "pod-security.kubernetes.io/warn"    = "restricted"
      "pod-security.kubernetes.io/enforce" = "baseline"
    }
  }
}
This is the K8s namespace we are going to deploy our stack to.
resource "kubernetes_config_map" "envoy_config" {
  metadata {
    name      = "${var.cf_tunnel_s3_gateway}-envoy-config"
    namespace = kubernetes_namespace.keycloak_namespace.metadata.0.name
  }

  data = {
    "envoy.yaml" = file("./config/envoy.yaml")
  }
}

resource "kubernetes_deployment" "envoy" {
  metadata {
    name      = "${var.cf_tunnel_s3_gateway}-envoy"
    namespace = kubernetes_namespace.keycloak_namespace.metadata.0.name
  }

  spec {
    replicas = 1

    selector {
      match_labels = {
        app = "${var.cf_tunnel_s3_gateway}-envoy"
      }
    }

    template {
      metadata {
        labels = {
          app = "${var.cf_tunnel_s3_gateway}-envoy"
        }
      }

      spec {
        security_context {
          run_as_user     = 1000
          run_as_group    = 3000
          fs_group        = 2000
          run_as_non_root = true
        }
        container {
          name  = "envoy"
          image = "envoyproxy/envoy:v1.30-latest"
          args  = ["-c", "/etc/envoy/envoy.yaml"]
          security_context {
            allow_privilege_escalation = false
            seccomp_profile {
              type = "RuntimeDefault"
            }
            run_as_non_root = true
            capabilities {
              drop = ["ALL"]
              add  = ["NET_BIND_SERVICE"]
            }
          }

          image_pull_policy = "IfNotPresent"

          port {
            name           = "http"
            container_port = 8080
          }

          resources {
            requests = {
              cpu    = "30m"
              memory = "256Mi"
            }
            limits = {
              cpu    = "50m"
              memory = "512Mi"
            }
          }

          volume_mount {
            name       = "envoy-config"
            mount_path = "/etc/envoy"
          }

          readiness_probe {
            http_get {
              path   = "/healthz"
              port   = "http"
              scheme = "HTTP"

              http_header {
                name  = "x-envoy-livenessprobe"
                value = "healthz"
              }
            }
          }
        }

        volume {
          name = "envoy-config"

          config_map {
            name = kubernetes_config_map.envoy_config.metadata.0.name
          }
        }
      }
    }
  }
}

resource "kubernetes_service" "envoy" {
  metadata {
    name      = "${var.cf_tunnel_s3_gateway}-lb-svc"
    namespace = kubernetes_namespace.keycloak_namespace.metadata.0.name
  }

  spec {
    selector = {
      app = "${var.cf_tunnel_s3_gateway}-envoy"
    }

    port {
      name        = "http"
      protocol    = "TCP"
      port        = 80
      target_port = 8080
    }

    type = "ClusterIP"
  }
}
This is the full stack for Envoy-Proxy side of things which include:
- A K8s ConfigMap with the envoy config we defined in the previous step,
- A K8s Deployment for Envoy that uses the above config map,
- A K8s Service for the Envoy deployment.
resource "random_password" "tunnel_secret" {
  length = 64
}

resource "cloudflare_zero_trust_tunnel_cloudflared" "tunnel" {
  account_id = var.cf_account_id
  name       = "Terraform managed cloudfare tunnel for ${var.cf_tunnel_s3_gateway}"
  secret     = base64sha256(random_password.tunnel_secret.result)
}

resource "cloudflare_record" "s3_record" {
  zone_id = var.cf_zone_id
  name    = var.cf_s3_gateway_domain_record
  content = cloudflare_zero_trust_tunnel_cloudflared.tunnel.cname
  type    = "CNAME"
  proxied = true
}

resource "cloudflare_zero_trust_tunnel_cloudflared_config" "s3_gateway_config" {
  tunnel_id  = cloudflare_zero_trust_tunnel_cloudflared.tunnel.id
  account_id = var.cf_account_id
  config {
    ingress_rule {
      hostname = cloudflare_record.s3_record.hostname
      service  = "http://${kubernetes_service.envoy.metadata.0.name}:80"
    }
    ingress_rule {
      service = "http_status:404"
    }
  }
}

resource "kubernetes_deployment_v1" "cf_tunnel_s3_gateway" {
  depends_on = [
    cloudflare_zero_trust_tunnel_cloudflared_config.s3_gateway_config,
    kubernetes_service.envoy
  ]
  metadata {
    name      = "cf-tunnel-${var.cf_tunnel_s3_gateway}"
    namespace = kubernetes_namespace.keycloak_namespace.metadata.0.name
  }
  spec {
    replicas = 2
    selector {
      match_labels = {
        app = "cf-tunnel-${var.cf_tunnel_s3_gateway}"
      }
    }
    template {
      metadata {
        labels = {
          app = "cf-tunnel-${var.cf_tunnel_s3_gateway}"
        }
      }
      spec {
        security_context {
          run_as_user     = 1000
          run_as_group    = 3000
          fs_group        = 2000
          run_as_non_root = true
        }
        container {
          name  = "cloudflared"
          image = "cloudflare/cloudflared:latest"
          command = [
            "cloudflared",
            "tunnel",
            "--metrics",
            "0.0.0.0:2880",
            "--no-autoupdate"
          ]
          args = [
            "run",
            "--token",
            "${cloudflare_zero_trust_tunnel_cloudflared.tunnel.tunnel_token}",
          ]
          security_context {
            allow_privilege_escalation = false
            seccomp_profile {
              type = "RuntimeDefault"
            }
            run_as_non_root = true
            capabilities {
              drop = ["ALL"]
              add  = ["NET_BIND_SERVICE"]
            }
          }
          liveness_probe {
            http_get {
              path = "/ready"
              port = 2880
            }
            initial_delay_seconds = 10
            period_seconds        = 10
            failure_threshold     = 1
          }
        }
      }
    }
  }
}
This is the full stack for the Cloudflare side of things which include:
- A Cloudflare Tunnel,
- The Cloudflare Tunnel configuration that points to the Envoy Service.
- A Domain record for your S3 API endpoint that is going to be publicly accessible and proxied.
- A K8s deployment for the Cloudflare tunnel itself.
Note that the Envoy Proxy K8s Service is a cluster internal service. Which means there is no need for NodePorts/Load Balancers, Ingress Controllers, etc. The Cloudflare Tunnel provides an Egress only route to our Service hence mitigating Direct DDoS attacks to our S3 API
Now add a file to populate the variables:
cf_api_token  = "<api-token-value>"
cf_account_id = "<cloudflare-account-id>"
cf_domain                   = "<root-domain-record>"
cf_zone_id                  = "<cloudflare-zone-id>"
cf_s3_gateway_domain_record = "<s3-cname-domain-record>"
cf_tunnel_s3_gateway        = "<arbitrary-value-for-logical-isolation>"
variables.auto.tfvars should not be committed to your Version/Source Control.
The variable cf_tunnel_s3_gateway is used for K8s Namepsapce, Tunnel name, and other Kubernetes configuration. So use a logical name.
At this point you are good to go. Run the following commands from the root of the directory:
terraform init
terraform fmt .
terraform plan --out plan.txt
terraform apply plan.txt
Once done, you should be able to use the browser for validating your public access to your S3 API endpoint.
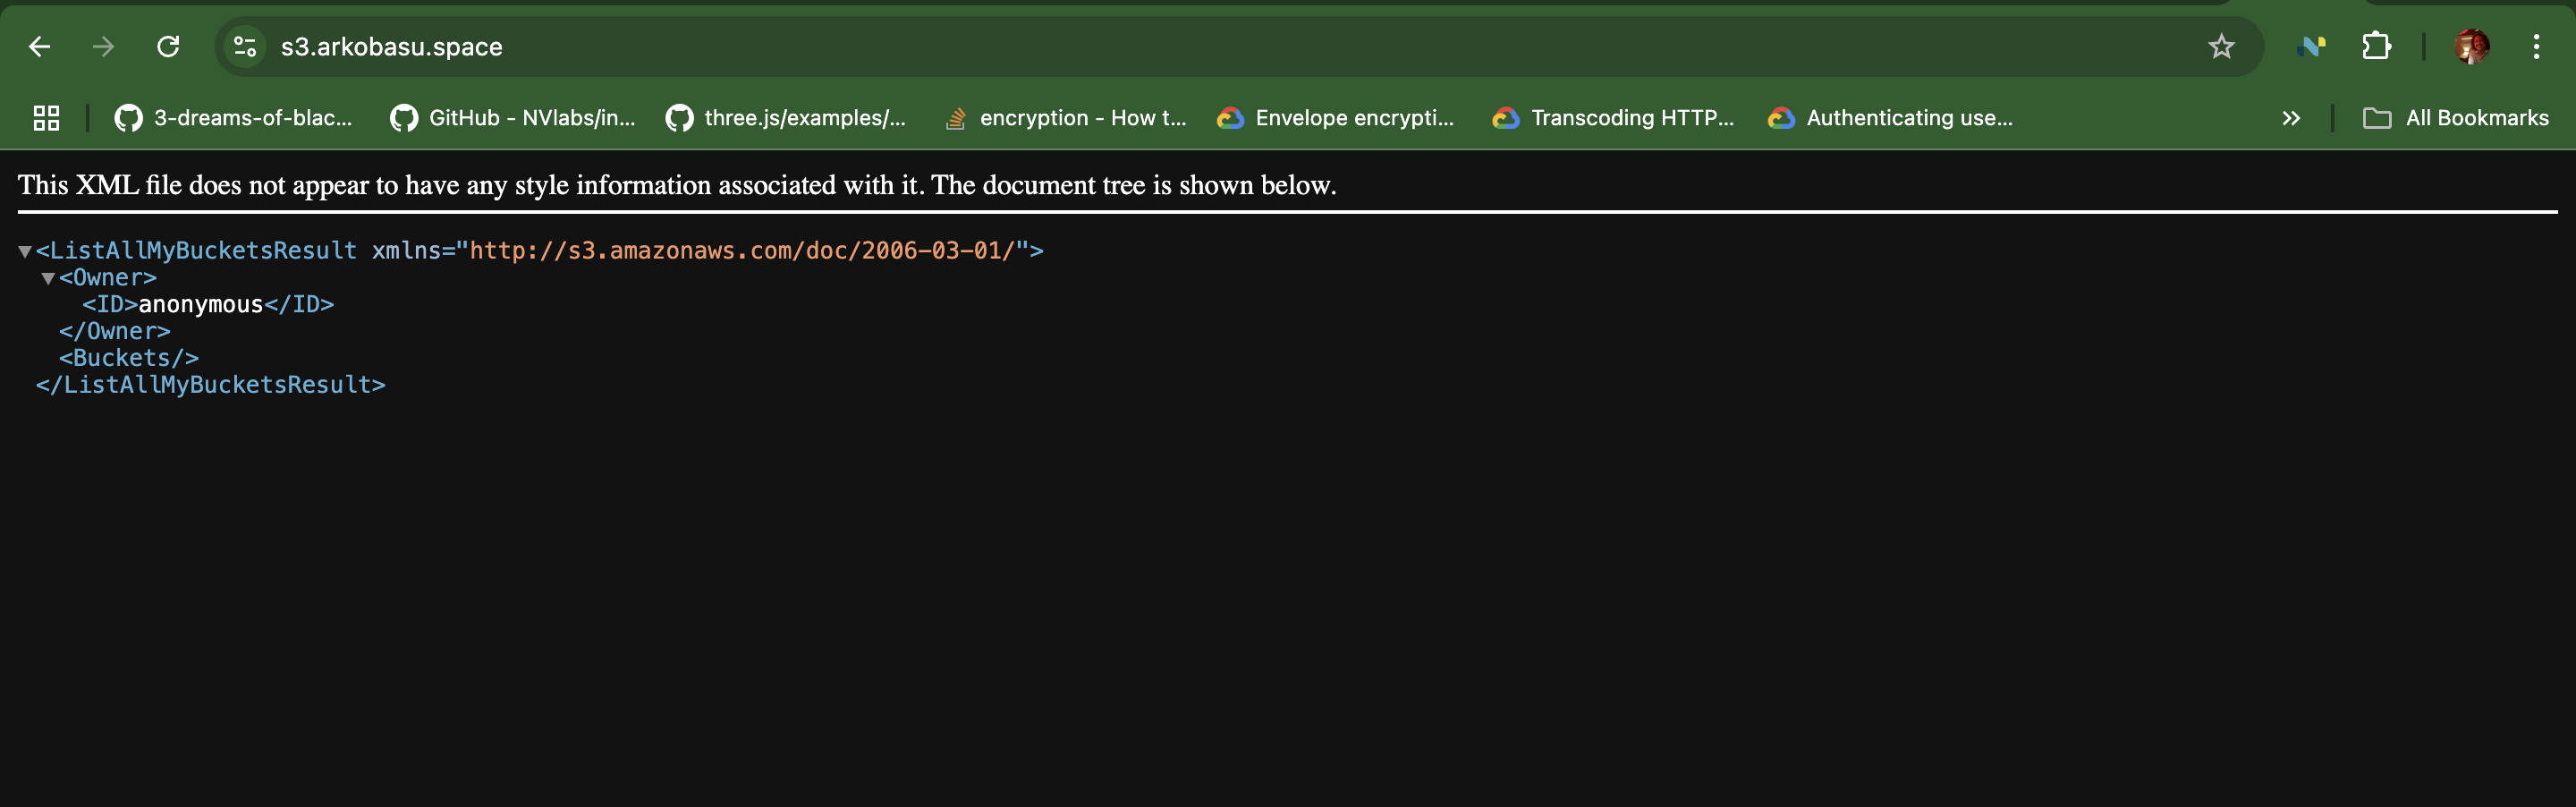
Now let's proceed with setting up some account credentials for usage with our S3 endpoint.
S3 IAM using Ceph's Squid Release
With Ceph's Squid release, it enables yet another powerful feature. It supports user accounts as an optional feature to enable self-service management of Users, Groups, and Roles similar to those in AWS Identity and Access Management (IAM).
In this section we are going to look at how to:
- Create an Account
- Create a User with Full S3 Access
- And configuring AWS CLI to use our Ceph backed S3 endpoint with the new user over public internet.
Each account is managed by an account root user. Like normal users and roles, accounts and account root users must be created by an administrator using radosgw-admin or the Admin Ops API.
For the purpose of this blog we are going to create the Account and the Root user using radosgw-admin within the cluster. After which we can proceed with using the account credentials from outside the network using our publicly accessible endpoint.
- Login to one of the Nodes on which you enabled the RGW Service and run the following command to create a new user:
sudo radosgw-admin account create --account-name="account-name" --email="email@domain.com" - Create an Account root user:
radosgw-admin user create --uid="account-name-root" --display-name="AccountNameRoot" --account-id="AccountIDGeneratedFromPreviousCommand" --account-root --gen-secret --gen-access-keyThe account root user’s credentials unlock the Ceph Object Gateway IAM API. We can at this point start using it from outside our network since our Object Gateway API is already publicly accessible.
- Follow the instructions to setup new users under this account and provide AWS IAM based S3 Roles to your user using AWS CLI. Simply update the endpoint_url to: https://s3-cname-record.cloudflare-root-domain and you are good to go.
Voila. At this point you should be able to setup AWS CLI or use other AWS SDKs to programmatically access your Ceph backed S3 Endpoint like you would on AWS.
Ceph based S3 for Terraform Backend
Now that we have a fully functional S3 Endpoint exposed publicly using Cloudflare Tunnels we can start using it as a Terraform backend for state management right away. Let's take a look how:
- Create a bucket using AWS CLI for use for terraform backend once you have setup the user:
aws s3 mb s3://<bucket-name> - Add the following section to any of your terraform configuration:~/ceph-s3-gateway/provider.tf
terraform { backend "s3" { bucket = "<bucket-name>" key = "<redacted>/terraform.tfstate" region = "default" profile = "<profile-created-by-account-root>" skip_region_validation = true skip_credentials_validation = true skip_metadata_api_check = true force_path_style = true endpoint = "https://<redacted-cloudflare-proxied-dns>" } required_providers { random = { source = "hashicorp/random" } cloudflare = { source = "cloudflare/cloudflare" version = "~> 4" } kubernetes = { source = "hashicorp/kubernetes" version = "2.35.1" } } required_version = "1.5.7" } provider "cloudflare" { api_token = var.cf_api_token } provider "kubernetes" { config_path = "~/.kube/config" } - Run the following to migrate your terraform state to Ceph backed S3:
terraform init -migrate-state
You might notice that we are pinning the Terraform Version here in this provider configuration. The reason for this is, the newer versions of terraform uses aws-sdk-go-v2 library has a bug that causes SignatureDoesNotMatch this error. I have created a bug report with Hashicorp for fixing this. If you are using the endpoint value as a network internal IP then it should work, but when using Cloudflare Proxied DNS it throws errors. The Signature mismatch is only for this Library and not for other AWS SDKs. You can refer to my blog here where I use a Cloudflare Proxied Ceph backed S3 endpoint programmatically with different AWS SDKs and it works just fine.
That's it. You now have a self-hosted S3 gateway that you can use with Terraform as a backend. Feel free to run AWS CLI commands to check the bucket after terraform has migrated your state files.
Conclusion
With this we come to the end of this blog. I hope you are convinced that Ceph stands out as a powerful, flexible, and self-hosted storage solution that seamlessly integrates block, object, and file storage into a unified platform. Whether you’re deploying highly available multi-node clusters, setting up a publicly accessible S3 API with Cloudflare Tunnels and Envoy, or implementing IAM controls with Ceph’s Squid release, the ecosystem offers the scalability, resilience, and cost-effectiveness needed for modern infrastructure.
For Terraform users, leveraging Ceph’s S3-compatible object storage as a backend provides a vendor-independent, secure, and scalable alternative to traditional cloud storage solutions. It ensures full control over infrastructure state while reducing cloud storage costs and avoiding vendor lock-in.
By embracing Ceph, organizations can build robust, self-managed, and cloud-native storage architectures tailored to their exact needs. Whether you're managing private cloud deployments, Kubernetes workloads, or infrastructure as code, Ceph delivers the performance, security, and scalability required to meet the demands of modern IT environments. 🚀